

In case you are wondering, no, I don't get any sleep! ;)
The inspiration for this pillow came from the ever popular ombre effect. It has been "in style" for a few years now, but I really haven't incorporated it into my life yet. This was my opportunity. When I started redoing Lorelei's room, I knew I didn't want to get locked into just one pink or just one pattern or texture. I wanted to have a large range of shades of pink, as well as various black and white patterns and textures. I figured this way, I didn't have to pass up on things I loved because they wouldn't match her room. It also gave me more freedom to be creative and allows her room to change as her tastes change.
Three of her walls are white, and one is pink. Most of her decor is black and white, with just a few touches of pink and silver. I made over an old rocking chair in black and white with pink tacks. I just needed a bigger splash of pink in her room. Nothing too over the top, but something that would draw the eye and be a "WOW!" piece. I also needed a pillow. Her rocking chair is very low to the ground and has arms on it, and though the arms help me get up (because I am very tall and getting up out of a rocker that is as low as this one is not an easy thing!), Lorelei does bonk her head on them pretty often, so I knew I was going to need a pillow.

It was pretty time consuming and used a lot of hot glue. I am making a second pillow using another idea I have about how to make this even better and then I will post those adjustments if my plans work.

Until then, here is exactly how I created my Ombre Rosette Pillow.

I started with four shades of pink fabric and one white. I had four of the five fabrics on hand and after placing them in order from lightest to darkest I decided I needed one more very pale pink fabric to help transition the white to pink. I used a satiny fabric. You could use cotton, linen, etc. This pillow would look good with any fabric you choose.
One of my pink fabrics is actually even lining fabric, which is like $1 a yd at most craft stores. I was nervouse that the lining fabric might melt or not look as good but it blends right in and I actually prefer the way it feels over the other four fabrics. If you used all lining fabric, you could make this whole pillow for under $2 before your pillow form.
For one 16" pillow you will need:
1/4 yd of each of your three center fabrics (starting at the middle of the rosette and working out)
1/3 yd of your next fabric working out
1/2 yd of your last fabric, which you will also use for the pillow backing
16" pillow form
lots of hot glue sticks
hot glue gun
pins

First cut out a 17.5" square from your darkest fabric. If you are using a different size pillow form you will have to make adjustments accordingly. I started with a 16" pillow form so I added 1.5". I planned on using a 1/2" seam allowance so the rest of my allowance was for shrinkage from the hot glue. Turns out my guess was pretty good because it shrank about quarter of an inch all around.

See your lovely pile of fabric strips? Separate them by color, to make it easier on yourself, and arrange them in order with the lightest fabric closest to you.
Lay out your square base fabric and get your hot glue gun ready.
Starting with the lightest fabric, or the fabric you want in the center of your rosette, fold the raw edges in toward the center of your strip and then fold again so that your raw edges are tucked neatly away. Put a tiny dot of hot glue here to keep it shut as you start your rosette. As we glue and work out we will keep folding the raw edges in. If you want a frayed look, you can avoid tucking the raw edges in. Satin frays horribly so I didn't want to go for that look. It would have been a mess.
With the raw edges tucked and glued, loop the fabric around like you are going to make a knot.


Put a big dob of glue wherever you want to start your rosette on your pillow and glue your little starter rosette down. Be careful not to glue the rest of the fabric strip.

It is easiest to twist the fabric how you want it about 6-8" out, lay it against the already glued down portion of your rosette to make sure it looks good, then lift it up (pinching the end so it doesn't untwist), squirt a thin bead of hot glue along the path it is going to go, then flatten it on top.
Keep your rosette rows as close together as your can so your base fabric doesn't show through. If you accidentally leave gaps, you should be able to put a small dot of hot glue there and smoosh your rosette fabric on top of it.

When you get to the end of your first color, glue the ends down and then move on to your next lightest color. I folded the raw edges of my second color in and glued the end down right on top of the tail of my first fabric. This was effective for hiding the raw edges and kept the transition smooth without allowing any of my base fabric to show through. Use this technique for each color transition.

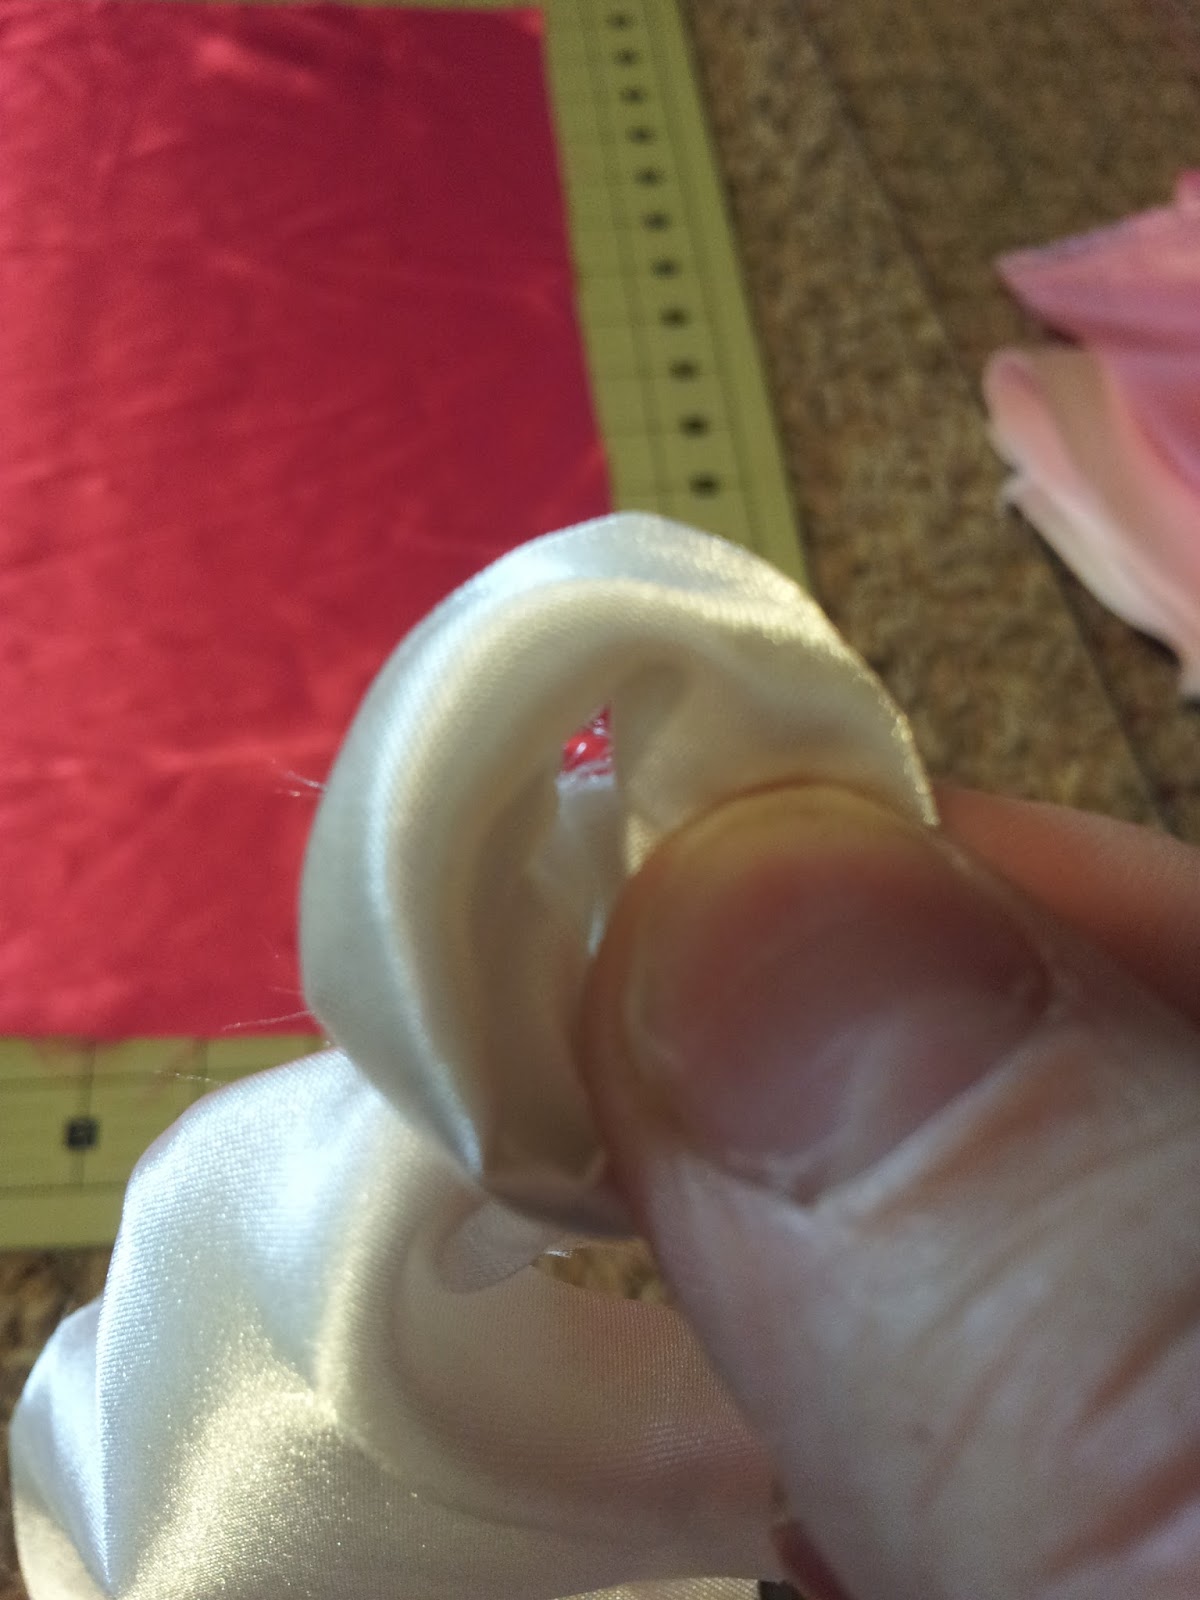
This is a picture of how I kept my edges tucked. I would fold them in like this, then fold the strip in half and twist.

When you get through a strip and want to continue one with the same color, just meet the edges and press close together and continue gluing, like I did above.


When you are finished, trim any straggly pieces hanging over the edge of your base fabric.


Pin and press both rectangles with a one inch hem on one long edge.


Sew 1/2" all around. Making sure to backstitch at the beginning and end.
Flip inside out and Voila! Gorgeous Ombre Rosette Pillowcase!


No comments:
Post a Comment